Warranty
We go to great lengths to ensure that every Orvis wader is built to our high-quality standards, but wear and tear, as well as the natural breakdown of materials over time, will eventually cause even the best-built waders to fail. The lifespan of waders is normally 3-5 years.
If you are not satisfied with your waders or if they fail for any reason within the first 60 days, we will replace them or refund your money, no questions asked. Beyond that, waders that fail due to manufacturing issues or defects will be repaired, replaced, or refunded at Orvis's discretion.
Damage or failure from normal use, wear and tear, or accidents are not covered under our warranty.
Wader Care
Orvis waders are designed and built to handle heavy use in the toughest environments, but they will begin to wear down over time. To help keep your waders in service for as long as possible, there are a few basic things to consider. How you care for your waders after fishing and between trips can have a big impact on their ability to keep you dry.
When changing in and out of your waders, use a changing mat such as our Wader Mudroom to avoid direct contact between the ground and the neoprene booties. Once you step into your waders, put your boots on as soon as possible, and, above all, avoid walking around without boots, as stepping on sharp rocks/gravel, etc., can damage the neoprene. Small bits of debris can also cling to the bottom of the neoprene, continuing to cause damage even after you put your boots on.
Give your waders a quick rinse with fresh water to remove any mud or debris before drying and storage. Mud and dirt can work their way into the fabric, preventing the breathable membrane from doing its job. A quick rinse off with the hose can keep this from happening. Rinsing is especially necessary if you have been fishing in saltwater environments, as the salt can cause damage to the wader fabric and hardware over time.
Once your waders have been rinsed, let them dry fully—inside and out—before storing them. Storing waders without allowing them to dry will promote the growth of bacteria and mold and could cause them to fail prematurely. Once the outside is dry, make sure to turn them inside out and allow the inside to dry as well.
Where you dry your waders is equally important. Although they are common places to store waders, a basement or garage is not always the best place to dry them out. Choose somewhere with good airflow, but make sure it is out of direct sunlight as prolonged UV exposure can damage wader fabrics.
Store your waders in a cool, dry place, away from moisture and direct sunlight. Waders can be rolled for storage but should not be folded. Folding can cause creases that may eventually lead to weak spots that fail over time.
Bootfoot waders should be stored with the boots resting on the ground to reduce stress on the weld joint between the bootfoot and the wader material.
Bacteria and mold growth are both serious issues that if left unchecked can cause permanent, unrepairable damage to waders and reduce their lifespan. There is no way to prevent your waders from encountering bacteria or mold, since they naturally occur on our skin and in the environments in which we use our waders, but you can maintain your waders to prevent their spread and growth. Periodically cleaning your waders using the instructions detailed in this guide and following our recommendations for drying and storage will help prevent your waders from becoming damaged by bacteria and mold.
DIY Repairs
If you would like to repair your waders on your own, it is very simple. The procedure for repairing punctures and tears is outlined below.
The first step is to locate the puncture. Sometimes, this is very apparent and can be visually determined quickly and accurately. However, in most cases, you will have a general idea of where the puncture is but aren’t 100% sure of its exact location. The quickest way to locate the source of the puncture is to turn your waders inside out and spray the general area of the leak with rubbing alcohol. Take your hand and spread the rubbing alcohol onto the inside fabric. Turn your waders right side out and look for a dark spot to appear on the face fabric.
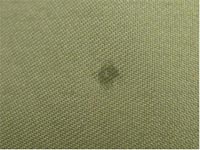
Once located, mark the spot on both the outside and inside of the wader. At this point, you will need to have either the Aquaseal Wader Repair Kit or a tube of Aquaseal to complete the repair. Make sure the area is clean using plain rubbing alcohol.
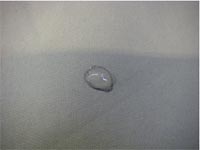
Apply a dab of Aquaseal to completely cover the spot and extend it for about 1/8 of an inch to the outside of the wader.
Let it dry for about 12 hours (to speed drying time use Cotol) and repeat the process on the inside.
For larger punctures or punctures in high-wear areas, apply a second coating of Aquaseal over the initial application. Be sure to extend the second coat 1/8" beyond the edge of the first application so that it can adequately bond to the wader.
If you tear your breathable waders, the repair process is slightly different. Locating the tear isn’t an issue, but you will need to stabilize the area by applying some tape to the inside of the wader. The Aquaseal Wader Repair Kit includes tape, but common duct tape will work in a pinch.
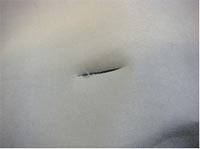
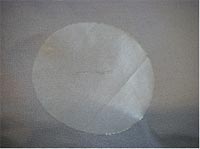
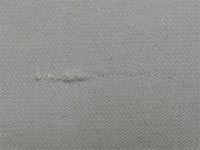
Apply the tape to the inside of the wader, matching the two sides of the tear together neatly.
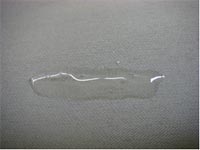
Clean the area with alcohol and apply enough Aquaseal to cover the tear completely and overlap by 1/8 of an inch.
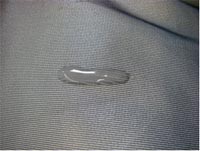
Allow to dry for about 12 hours (to speed drying time use Cotol). Remove the tape from the inside of the wader and clean the area with alcohol to remove any residue left by the tape. Repeat the Aquaseal application on the inside of the wader.
For larger tears or tears in high-stress areas, apply a second coating of Aquaseal over the initial application. Be sure to extend the second coat 1/8" beyond the edge of the first application so that it can adequately bond to the wader.
Aquaseal will facilitate a temporary repair in the field but is not durable enough for a permanent repair.
DWR Coating
The outer surface of most laminated waterproof-breathable fabrics is treated with a Durable Water Repellent (DWR) coating. This chemical treatment forces water to bead up and roll off the surface of the fabric improving the overall performance and comfort of the garment.
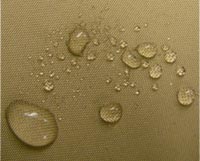
DWR coatings will begin to degrade after extended use and as the garment becomes soiled. The degradation will inhibit the DWR coating’s ability to bead water and cause the garment to “wet out” as the face fabric material absorbs water.
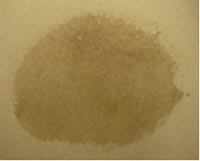
Although the garment is still waterproof, the water-saturated face fabric will hinder the garment's ability to breathe, increase interior condensation, and produce a cold, clammy feeling for the wearer. It is important to clean your garments regularly to help avoid this situation.
Most garments can be machined washed; consult the care instruction label on the garment. Be sure to use an additive-free powdered laundry detergent or a liquid detergent designed specifically for synthetic, breathable fabrics. Do not use any detergents that contain fabric softeners or color-safe bleach.
For machine-washable items, such as stockingfoot waders and jackets, use the following cleaning agents:
- Ivory® Snow powdered laundry detergent
- ReviveX® Synthetic Fabric Cleaner
- Nikwax® Tech Wash
For non-washable items, such as bootfoot waders, use Granger's G-Wash Spray Cleaner.
Please read and follow the instructions included with these products and the garment manufacturer’s care and cleaning directions.
Cleaning alone may not restore the DWR coating’s effectiveness. For a clean garment, use a cool iron or tumble dry on low to medium heat to reactivate the coating. Please follow the garment manufacturer’s recommended instructions for drying.
To reapply a DWR coating, we recommend the following products. Please be sure to read and follow the instructions for application carefully.
- Nikwax® TX-Direct
- McNett Revivex® Spray-On Water Repellent
With basic care and maintenance, your waterproof, breathable garment(s) should provide you with years of use and enjoyment.
)
)
)
)
)
)
)
)
)
)
)